Photo: Claire Lower
There is something quite homey and family-oriented about the site of a whole roasted chicken. It makes a warm and welcoming centerpiece, can feed multiple people, and tells the guests at your table “I can cook” in no uncertain terms. If you eat meat, it’s a good staple to have in your arsenal of homemade meals.
There is no one, definitive way to cook a whole chicken, but I have my favorites. If you are familiar with my “work” at all, it will not surprise you to learn that my choice recipes are easy, with low ingredient counts and lots of hands-off time. I’m sure there are many good chicken recipes with long lists of ingredients and lots of steps, but that’s not the kind of cooking I do, at least not during the week. Here is how to get started; more ambitious efforts can wait.
Configure the bird
I am very pro-spatchcock and anti-trussing, and you could probably do neither and be just fine. Spatchcocking—removing the back bone and pressing down on the breast bone so the bird lays fat—helps the chicken cook more evenly. (You can watch a how-to video here.) Spatchcocking is absolutely necessary when roasting the thermodynamic nightmare that is a turkey, but the same general principles apply to a chicken:
Dark meat—such as legs and thighs—needs to be cooked to at least 165℉ for all that connective tissue to break down, but breast meat dries out if it gets much over 150℉. Traditional roasting leaves the breast more exposed than the legs, which are shielded by the sides of the pan, which is the exact opposite of what you want.
Flattening the bird shields the breast a bit and exposes the thighs and legs to more heat, speeding up the rate at which the dark meat cooks while slowing down the white. I highly recommend spatchcocking if you’re using a dry brine, but I’ve found the practice less necessary with a marinade like labneh or buttermilk, which we will discuss in a moment. (The breast won’t taste dry or overcooked—even if you cook it to 160℉—thanks to all the added moisture and a little bit of fat.) In either case, make sure you do any butchery before you apply your marinade or brine—things will get very messy otherwise.
I wouldn’t bother with trussing at all. It looks pretty, but it can slow down the rate at which the legs cook, and leave you with soggy skin. Letting the legs fly free allows them to see more heat and cook a little faster than the breast, which, again, is what we want. Keeping the legs close to the body also hides some of their skin, rendering it soft and flabby, which no one wants.
Save 24%
Wyze Smart Scale S
Tip the scales in your favor
This smart scale measures weight, body fat percentage, lean body mass, BMI, muscle weight, visceral fat, basal metabolic rate, bone mass, metabolic age, protein, body water percentage, and your heart rate.
Choose your brine or marinade
A beautiful labneh-marinated bird. (I took this pic before I abandoned trussing.)Photo: Claire Lower
Without seasoning, meat is just muscle. I have two favorite seasoning methods when it comes to the humble chicken—one dry, and one wet.
To keep it dry
If you want to go the dry route, start with a ratio of 1 teaspoon of kosher salt per pound of bird, and 1 teaspoon of sugar per four pounds, then add other powdered seasonings to taste if desired. You can add crushed garlic and fresh herbs to your sugar and salt mixture, but be prepared to brush them off before cooking, as they can burn. (I prefer mixing these fresh flavorings with butter and stuffing them under the skin; more on that in a bit.)
Season your chicken inside and out with your brine, then place in a dish or pan on top of wire rack and let the bird brine for at least 12 hours, or up to three days. The salt will draw water out of the meat, creating a concentrated wet brine with the chicken’s own moisture. This salty liquid will make its way back into the bird, for juicy, flavorful meat. Pat off excess moisture with paper towels, shove a bunch of butter under the skin (either plain or herb-flecked), then roast.
To get it wet
Nothing against salt and sugar, but I haven’t gone the dry brine route since I started marinating birds in buttermilk and labneh. Both cultured dairy products expose the chicken to acid, fat, and protein, making for a tender, juicy bird with the most glorious browned and burnished skin. If you want your chicken to look like something out of a magazine, use one of these.
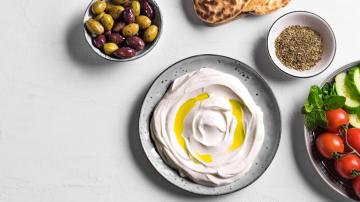
Samin Nosrat’s recipe for buttermilk-marinated chicken is flawless, but I tend to choose labneh—a Middle Eastern yogurt-cheese—more often that not (recipe here). You don’t have to worry about labneh spilling in the fridge; it clings to the chicken, making sure every inch of the bird is coated with lactic acid-heavy goodness.
Both buttermilk brined and labneh smeared chickens are extremely forgiving. I’ve even cooked them without a meat thermometer to excellent results (though you should always use a meat thermometer; the batteries in mine had died). The marinades add so much moisture and fat, they come out juicy and tender even if you overshoot the cooking temperature by a few degrees. Both marinades require 24 hours in the fridge; after that, just wipe off the excess and roast. (Want to level up? Try a feta brine or miso marinade next time.)
It’s ok if you don’t have time to brine
Brining or marinating is ideal, but some evenings there is simply no time. That’s okay. You can still season your chicken immediately before roasting. Liberally season the bird inside and out with salt (and pepper if you wish), then grab the mayo.
No, we’re not making sandwiches (not yet). We’re brushing the bird with the creamy condiment to promote browning (see the photo at the top of this blog) and flavor the skin. For those of you unfamiliar with this method, let me re-cap:
In terms of flavor, mayo doesn’t bring a ton, but you can mix all sorts of flavorful things into it with ease. Nigella Lawson adds Worcestershire sauce and crumbled bouillon to hers, but I went with Better Than Bouillon (the mushroom flavor), because I have a lot of that stuff. You can mix in whatever you want, though I would stay away from herbs, as those have a tendency to burn when applied to the outside of a chicken.
Season your mayo however you see fit, brush it on the skin, then pop that bird in the oven.
Let’s talk temp
If you’ve read a lot of chicken recipes, you’ve probably notice that they all call for different cooking temperatures. Some even call for several temperatures, and start out high to crisp the skin before dropping down low to bring the meat to temp (or vice versa). I’m a mono-temp kind of gal, but my temp is influenced by my brine or marinade. If I’m roasting a chicken that’s been marinated in something that really promotes browning (like buttermilk or labneh), I’ll roast at 375℉. If I used a simple dry brine of sugar and salt, I’ll smear that bird with olive oil or butter, then roast at 400℉. Really, anything in the 375℉–400℉ range will work just fine. If the chicken skin starts to brown a little too much, drop the temp down a bit. No need to overthink it.
No matter where you set your oven dial, you’re going to need a meat thermometer. Seriously: Short of hacking into the bird to take a peak at its muscles, you will not be able to tell if your meat has been cooked to a safe temperature (or overcooked) without one. Cooking “until the juices run clear” is not a reliable method.
Buy an instant read digital thermometer and aim for a temp of 155℉ in the breast and 165℉ in the darker regions. If you marinated your bird with buttermilk or labneh, you have a little more leeway with the breast meat. Even breast meat that’s been soaked in cultured dairy for 24 hours will be juicy and tender, even at 160℉.


