Photo: Tatevosian Yana (Shutterstock)
The satisfaction of watching your tiny shoots push out of the ground after weeks of waiting is one of the best parts of gardening—unless your seeds don’t germinate as evenly as you’d like. Some of your seeds may not even sprout at all, or meddling squirrels may have carried them away before they got the chance. But there’s a solution that will help you predict the rate of germination for your seeds and shorten the amount of time it will take them to sprout: indoor sprouting.
What you need for indoor sprouting
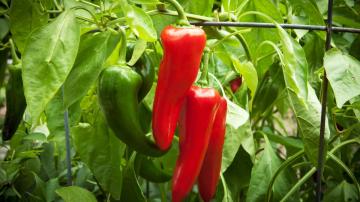
The first thing to know about indoor sprouting is that it works best with larger seeds like peas, beans, and squash. That’s not because the smaller seeds won’t sprout, but because they’re more fragile and difficult to handle. Instead, using seeds you can easily hold between your thumb and forefinger is a good place to start for indoor sprouting.
Next, you’ll need a clear container—this could be as simple as a Ziploc bag or plastic resealable food container with a clear lid, or even a muffin tin with a lid (if you can find a clear lid that will let in the sunlight). The important thing is to be able to keep your seedlings warm and moist while germinating, so really any container with a lid that lets in sunlight will work.
You’ll also need a waterproof marker, some paper towels, a spray bottle with water, and a sunny windowsill.
G/O Media may get a commission
Streamin' USA
Allows you to use a bunch of streaming services in one place, grants access to live TV thanks to things like YouTube TV, and can be controlled using your voice.
How to create an indoor sprouting station
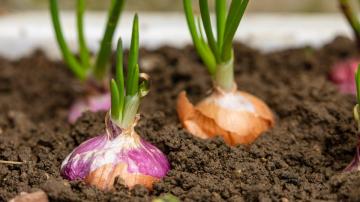
To set up your indoor sprouting operation, dampen enough paper towels to cover the bottom of your container—this is your soil stand-in for the first leg of your plant’s journey. Next, add your seeds to the paper towel, keeping them at least two inches apart. Label your container as you go with your waterproof marker (otherwise you risk forgetting what you’ve planted). Then, put your lid on, or zip up your bag.
Once your germination laboratory is set up, place it on a windowsill and use the spray bottle as needed to keep the paper towels damp. These pre-sprouted seeds will grow faster than seeding straight to soil because the warmer conditions of your windowsill are better for germination than the soil—and the bonus is that you’ll have a lot less duds.
Different types of seeds vary on how long it will take them to sprout, but once you start seeing tiny roots that look like white veins, it’s time to put them in the ground. If the seed seems particularly reluctant to leave its paper towel home, its roots may have adhered to the paper. Gently trim around the roots to avoid disrupting them, keeping in mind that if a seedling loses its roots, it will die.
Plant your seedlings
Once your seeds are sprouted, they can be planted into growth medium to become indoor starts, or you can opt to plant them directly in the soil. Depending on the seed type, you’ll just need to make sure that the soil you’re using is warm enough to keep the seedlings growing. You can plant the sprouts with a thin layer of soil over top to allow them to grow through quickly.