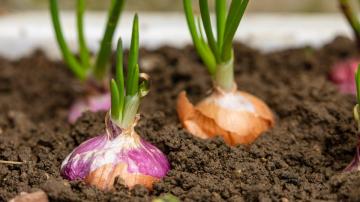
Drip irrigation systems make sense on a number of levels. Because you’re watering exactly where you need to, you’re watering as much as 70% less. That’s because, as you hand water, a lot of what you’re watering is the tops of plants, which generally don’t need or benefit from it. Plants need water at the roots, which is what drip watering accomplishes.
Overhead watering has a second problem: It splashes onto the soil, disturbing the microbes in the soil, which then splash back up onto your plants. This is how you spread disease in the garden. Drip just slowly leaches water the soil, so it doesn’t have that issue.
But the best argument for drip is time savings. I enjoy my garden, but I do not enjoy lugging hoses around the yard or all the time spent standing in the sun, nor do I trust someone else to water the way I would when I’m away. Drip, and by extension, a timer, meant I could walk away and trust the yard was getting the resources it needed.
What is drip irrigation for your garden?
Drip irrigation is an in-ground system that brings water off your main water line, through a backflow preventer, to your garden. It first connects with a manifold—which splits the water into the various lines and zones it needs to go to—and connects with a timer, which tells the valves when to open and shut. That sounds complicated and...it is. But it’s not hard, it is mostly doable on your own, and pays off in spades.
Why cheaper alternatives to drip don’t work as well
There are all kinds of products on the market that get you halfway to drip irrigation. There are soaker hoses, which attach to the hose bib, slowly drip water into the soil, and can be attached to timers. Or ollas, which are under-fired terra cotta pots you plant in the ground that slowly leach water and attract the roots of nearby plants. (Ollas have been in use by Native Americans for as long as gardening has existed.)

Just a fraction of the ollas replaced by a simple drip system. Photo: Amanda Blum
But all of these systems have some major drawbacks. To start with, drip systems connected to your hose bib are likely to be illegal in your state because they require backflow prevention— meaning that once the water is out of the hose bib, it never goes back in. Those regulations change state to state, but if you google “backflow, hose bib, (your county),” you’re likely to find your regulations. Sometimes, you’ll be able to use an inline backflow device, which are small, inexpensive and easy to install. Other times, you may need to connect the backflow to your main water line, which is a professional installation.
Soaker hoses tend to break down in the sun fairly easily, in my experience, but they have another more immediate issue, which is pressure. The gallons per hour (GPH) coming off your hose bib isn’t great, and that pressure is what makes your drip or soaker hoses work all the way through, from end to end. That’s why irrigation systems generally need to come off your water main.
Ollas are great for remote locations to ensure root-level watering, but you need a lot of them, and unless you’re a potter, they’re expensive. They’re also, by their very nature (under-fired clay) very fragile. It’s recommended you remove them for winter which means storing them without cracking them. Lastly, you have to fill them all the time. After a few years of ollas, I removed most and went to drip.
How to create drip irrigation zones in your garden
When I decided to finally buckle down for drip, I started with the most adult thing I’ve ever done in my garden, which was to measure it. I made a graph and charted out all the space, all the boxes, where my water main was, the hose bib, etc. It looked like this.

A scaled schematic of the garden, the zones, and where lines would run. Photo: Amanda Blum
Next, I started trying to divide it into the zone, and visualizing where pipes would go, drawing them on the schematic. Obviously, you want to minimize how much pipe you’re using, how many turns it takes, and crossover of pipes. Feeling confident at this point, I crowdsourced help on Reddit in a landscaping sub, and eventually, I had a plan that everyone in the forum agreed on and had learned some valuable tips (like to always use two clamps on my pipes, and to always run my drip line in circles rather than lines).
The materials you need for drip irrigation
Your main lines are going to be 17mm and use 17mm fittings. You have choices on how far apart the holes are and how big they are. This is expressed in GPH (gallons per hour). You may want holes closer together for a vegetable bed than for your shrubs against the house. You may want more water (bigger holes) on tender plants like tomatoes and smaller ones on blueberries, which are perennially overwatered. There’s also some “blank” line, which looks exactly the same as the drip line, but has no holes at all, and is for moving water where you want it.
You’ll also need all those fittings—the tees, the elbows, the crosses, and more clamps than you could ever imagine. I recommend over-ordering and returning what you don’t use.
Trenching
Eventually, you have to put those pipes in the ground, and you want them to go under the frostline, which is different in each county. It meant making a slew of trenches all over my yard. Because it was still spring, the ground was soft from all the rain, which made things much easier. I bought a trenching shovel, which is very narrow. If I had the room to maneuver it, I’d rent a trencher, no question.
Regardless of how you make the trenches, you will eventually encounter pavement, which you’ll need to either go under or go through. Most people will simply tunnel under it. You can attach a special hose tip to a PVC pipe and use water to try and go through the mud under your pavement. You can just pound a metal pipe through, but that looked impossibly hard. There are augers that can run under a sidewalk and get you partially under a driveway. Finally, you can cut the driveway. After many attempts with water, I finally gave up and cut a narrow channel in the concrete, dug the trench, and re-cemented. It sounds like a lot of work, but that entire process took ninety minutes and $300. If I’d rented the saw (next time I will) it would have been far less.
The manifold and the timer

My manifold, which I’m particularly proud of. Photo: Amanda Blum
Your water comes from the main in one hose, so you’ll need to split into different hoses going different places and use valves to tell it when to send the water and when to stop. This is a manifold. You are taking electronic valves and building a branching PVC octopus, while trying to keep it as compact as possible to fit in an in-ground box. That octopus also needs to accommodate any inline filters, blowout valves and manual ball valves. You can buy manifolds pre-made, but I got great satisfaction making mine, and learning about the various PVC connections that can be made to make it more efficient.
The magic sauce that tells the valves when to open—and make it possible to go on vacation—is a timer. New wifi timers can sync to local weather stations, so they can automatically increase or decrease watering based on the weather. You can also control them or monitor them from your phone. Best of all, they don’t seem to be significantly more expensive than non-wifi enabled timers. I went with the Hydrawise timer, and connected it to a weather station I didn’t know existed three blocks away. Set-up took about thirty minutes.
Youtube videos became indispensable for me in figuring out what was needed supply-wise, and how to wire my manifold valves to my timer. It was easy once I understood it, though: Each valve has its own colored wire and a common white wire. I could bring all the white wires together to the timer, or daisy chain the white wire from one valve to another and just bring the last wire up to the timer.
The results

I extended the drip system to microline that can run up into wall planters and window boxes. Photo: Amanda Blum
I don’t think I’ve ever tackled a physically harder job than digging the trenches and installing all the drip. After all the supplies, I really only saved about 30% off what professional installers quoted; but although I’d have loved to skip the labor, the truth is that if I’d gone with a professional installation, I wouldn’t have any idea how the system worked, where the pipes were, or been able to affect where they went or understand how to branch off them.
Eventually I set up ¼” microdrip line coming off my 17mm lines for pots, and attached a few micro sprayers to effectively act as sprinklers for my lawn, and I added an emitter to refill a birdbath. I would never have been able to do that without having built it myself.
My water bill last year went down by half for the summer, the results I’d anxiously waited for. I was able to see, on the Hydrawise app, precisely how much I was saving week to week, and why the timer had chosen to water more or less. It will take many years to get back my full investment, but it was still worth it.
My plants had the most prolific, disease-free season of my gardening career, and I was able to go camping on the weekends without worrying about the yard.


